When I started learning how to paint, I saw there were paints, washes, and inks. I knew what paints were for, but I had no idea what washes and inks were used for. With some research and practice I learned the difference between a wash and an ink.
A wash is thinned opaque paint, typically a dark shade, whose purpose is to pool in and darken the recesses or crevasses of your miniature to give your paint job natural depth and shadow. An ink has a high ratio of fine, powdered pigment suspended in a translucent medium designed to subtly alter or enhance the color of a painted surface.
Even beginner painters should use and apply washes. They add a subtle darkening of surfaces, which gets deeper as the wash pools on your miniature. Be careful applying it to flat surfaces as the paint in the wash and muddle your paint job.
Inks, on the other hand, are a technique for intermediate to advanced painters. They allow you to layer translucent colors on top of opaque paint to create dynamic color gradients. They are also used for wet blending of colors, which is an advanced technique.
This article references several different painting products. If you want to explore those products and links to them, please visit my Resources Page.
Washes and Shades
The most basic of washes is the black wash. I have made my own, in a pinch, by simply mixing a healthy amount of water with black paint. But even then, the shading was too much or too opaque. It is used to provide definition to the lines of your miniature.
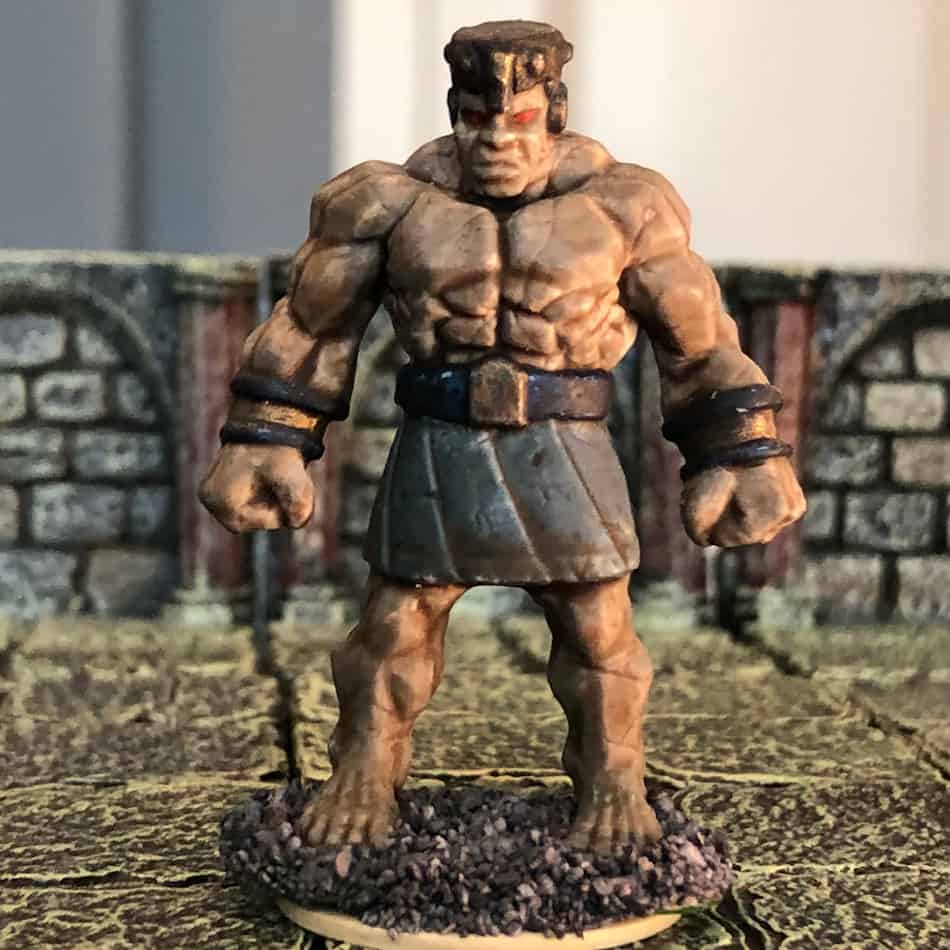
This Stone Golem was simple to paint. Reaper’s stone grey paint for the “skin”, walnut brown for the belt and wrist straps, and bronze for the buckle and crown. The kilt was painted with a soft blue paint and the eyes used fresh blood red.
All of the definition you see across the chest and arms is because of the black wash I applied after base coating. I probably did an extra layer to the clavicle line and the line down the middle of the chest to emphasize the definition of the Clay Golem’s rock-hard abs.
Notice the dirt or grim along the bottom of the kilt. Again, that is from the black wash. The wash also picked out the pleats of the kilt and the tiny horizontal chips and imperfections of this bettered golem.
I often use an extra layer of wash on feet, lower legs, or the trailing hems of cloaks. Being close to the ground, they are naturally dirty and stained looking.
Also, the black wash helped turn the brighter bronze of the belt and crown into an antique or weathered bronze. I probably used a few coats because metallic paints tend to repel watered down paints like washes.
Notice that I used walnut brown on the belt rather then a straight black. The walnut brown paint is very dark, almost black. Adding the wash darkens it further, without being just a flat uninteresting black.
A different technique you can use is start with a dark grey base coat. Adding a black wash will make the surface look black, but give it some texture, instead of a solid, boring black.
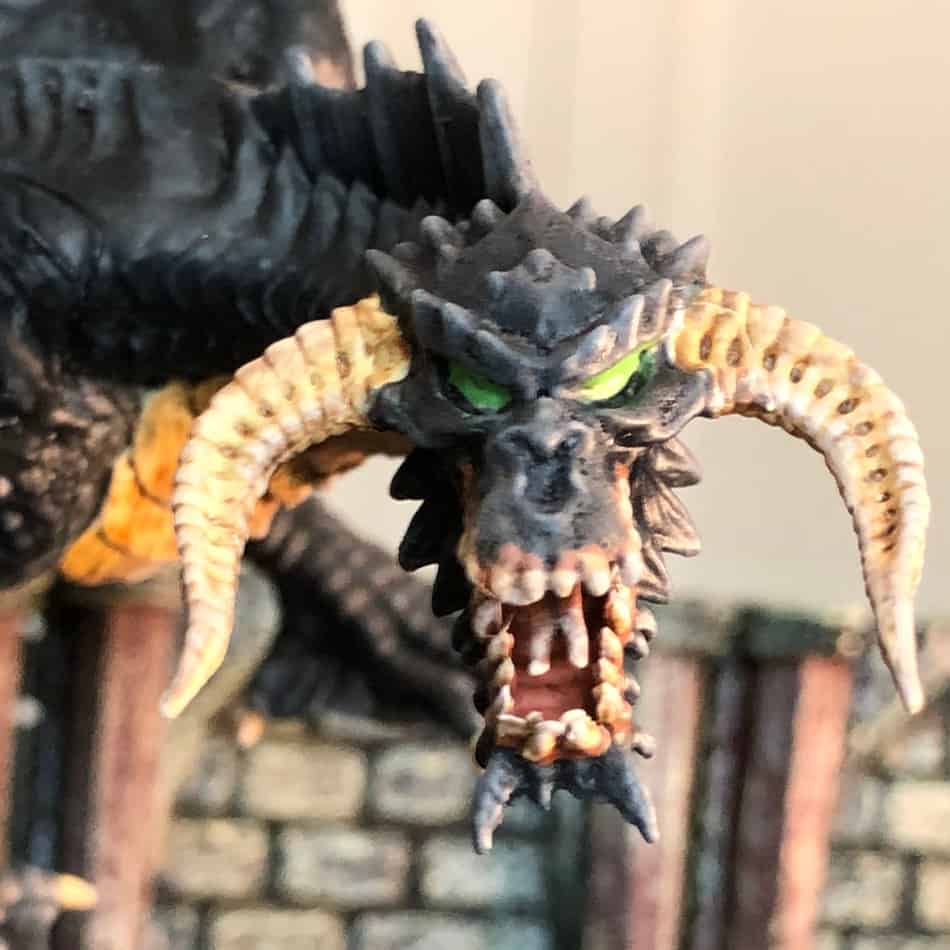
That is the technique I used painting this black dragon. Had I started with black paint, then there would have been no place to go with a wash to deep the color in the variations of the miniature.
There are other washes besides the basic black wash. The Citadel version is called Nuln Oil. Note that Citadel calls its these paints shades, whereas Reaper and Vallejo calls them washes. Nuln Oil adds a touch of grey pigment, making the shading slightly less intense than with black wash.
For a brown wash, I like Citadel’s Agrax Earthshade. It is perfect for making hems of cloaks or robes look soiled and road-stained. I used it for shading my Shambling Mound as the main base coat was brown.

Another wash I use is from Army Painter. They have a line of washes of various intensities. They call their washes “tones”. While their line has expanded, they started with four types: Light Tone, Soft Tone, Strong Tone, and Dark Tone. These are in order of intensity of the pigment.
Army Painter recommends that you use light tone or soft tone for your lighter colors and more heroic miniatures. The strong and dark tones are for your monsters and miniatures that need more crisp demarcation of lines. See my Stone Golem above as an example.
I have their soft tone wash. I use it for washing really light colors: bright reds, yellows and greens. It adds some definition to the miniature’s textures without fundamentally altering the base coat color.
One thing to note with Army Painter shades. They do have the same version of the tones in a can. These are varnishes for which you would use paint thinner to clean, not merely water. On their website, they explain these are for washing a lot of miniatures quickly.
You literally dip your miniature into the can and let the excess run off back into the can. You then flick off the varnish by holding your miniature with pliers. It then takes a long time to dry, which it does with a very glossy finish. Further highlighting or dry brushing is not advised. Instead you spray on a matte varnish to remove the shine. I do not recommend this product for beginner painters.
The final two washes that I regularly use is Vallejo’s Sepia Wash and Reaper’s Flesh Wash. The Sepia Wash adds a dark, yellowed color to whatever you paint it on. It is wonderful for teeth. It turns pearly, off-white teeth into gnarly, old yellow gnashers.
On the black dragon above, I used a little bit of Sepia Wash on the horns and some of the teeth. But as this is a young black dragon, I did not want the teeth too yellowed. But I went full dental-plan on the shambling mound.
Flesh wash is for exactly what’s on the label. After painting the skin of your doe-eyed human hero, you need to add some depth to that face! Flesh wash makes the skin look more realistic and …… well fleshy!

Inks
I’ll be honest. I have a lot less experience with inks. I consider myself an intermediate painter, having dabbled with some wet blending. As explained above, using inks well means having some understanding of color theory and knowing how to build up to a color layer by layer. Think of inks as a filter for your Instagram photos.
While I purchased Vallejo’s Ink Set, I have only used its purple ink. I was going for a very specific look for a very specific application: Tentacles. The base color that I prefer to use for my tentacles is brains pink (now renamed braaaaiins pink). But I want a purplish hue to them, which is where purple ink comes in.
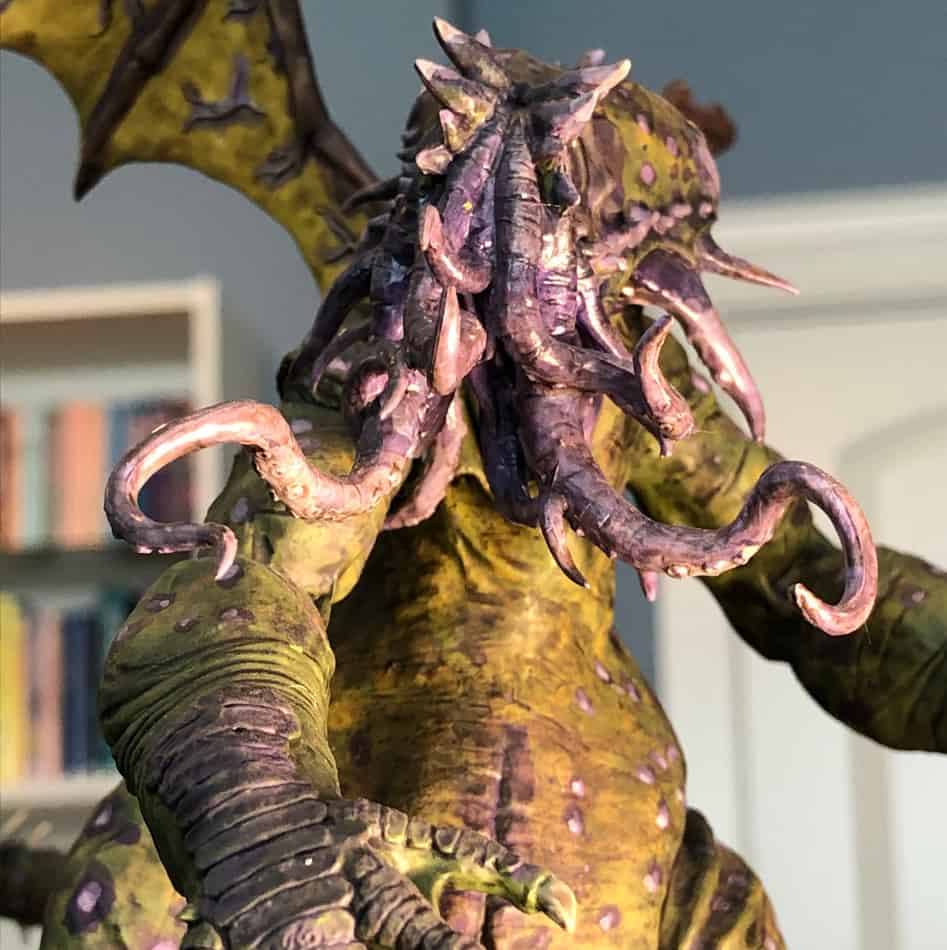
I still want the pink to show through, but with a purplish hue. Thus I coated the tops of Cthulhu’s tentacles with purple ink. I also used purple ink on the scaly backs of its hands, fingers, and forearms.
In researching the paints for this article, Reaper has added some paints to “solve” my tentacle “problem.” The first is simply called tendril pink. The other is Eldritch Purple. Either is fine as a base coat, but neither has the color depth or gradient I wanted for Cthulhu’s money-makers.
Neither of those colors, by themselves, look …… diseased enough. They will still require a shifting of the color that only an ink can provide. Again, inks are translucent, whereas paints are opaque.
Another application is the subtle shifting of color like flame.
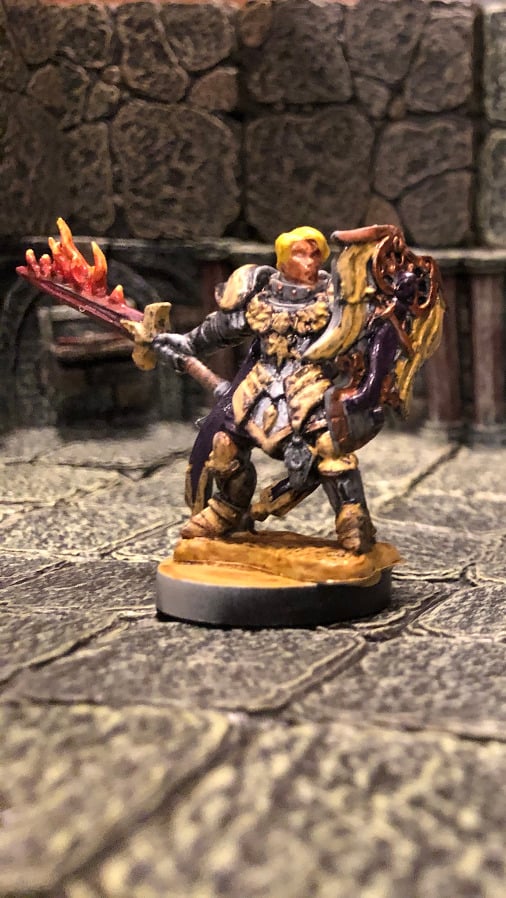
This flaming sword was created through a combination of very thinned paints and inks applied in layers. The trick with flames is taking the base color and moving it through orange, yellow, to almost white.
I started with the sword’s darker red. I was not too careful about getting the paint on the “wrong areas.” But I was worried about getting the lighter reds, oranges and yellows, on the lower areas of the model. This is why this is an intermediate technique.
You must think of the subtle color changes of flame: red to orange to yellow. You must make those changes without it looking sedimentary rock striations. It is those transition points where ink is useful. It still allows some of the original color to peek through, while promising the color that is yet to come.
On the model above, my color transitions were too sudden from the red to the orange. The dark red to lighter red feel subtle. The orange to the yellow also appear more subtle. While the transition to the fiery orange was too definite, that is ok. This miniature is fine for table use.
In short, inks are designed to sit on the surface of what you paint. Washes run and pool in the crevices.
If you want to start to learn on how to paint miniatures, click already! If you want to read more of my posts about Dungeons and Dragons, then click away here! Or maybe you want to explore the wilder (and wider) world of tabletop roleplaying games!
