When I was just learning how to paint miniatures for my Dungeons and Dragons and other roleplaying games, I spent a lot of time trying to figure out what I was doing. These are five techniques beginner painters can easily learn to make their miniatures look better:
- Prime the miniature with white or black primer.
- Base coat the miniature using 2-3 thinned layers of paint.
- Apply a wash coat to create depth and contrast.
- Dry brush the miniature with the same base coat color
- Finish with a clear gloss coat followed by a matte varnish.
Obviously, you will need supplies to start painting miniatures. Click here for advice on what supplies you should get if you’re a beginner miniature painter. Once you have those supplies, continue reading to learn the five techniques you’ll need to begin painting miniatures!
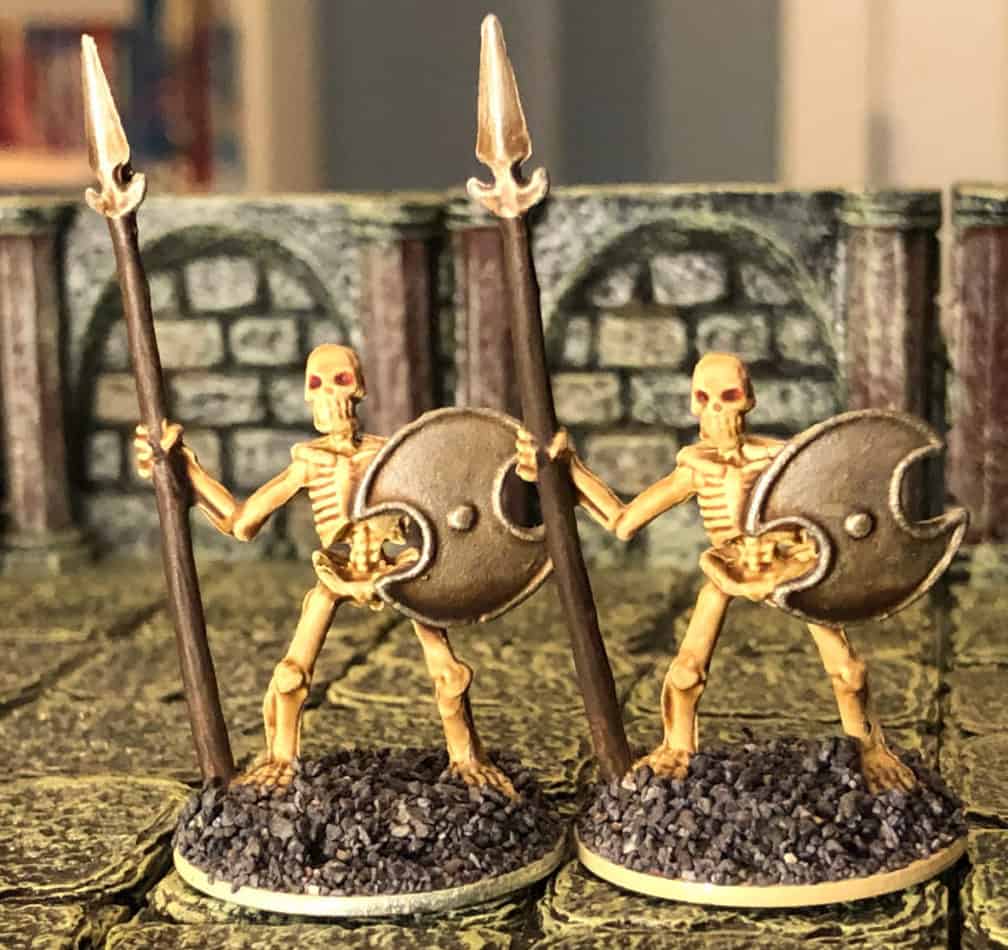
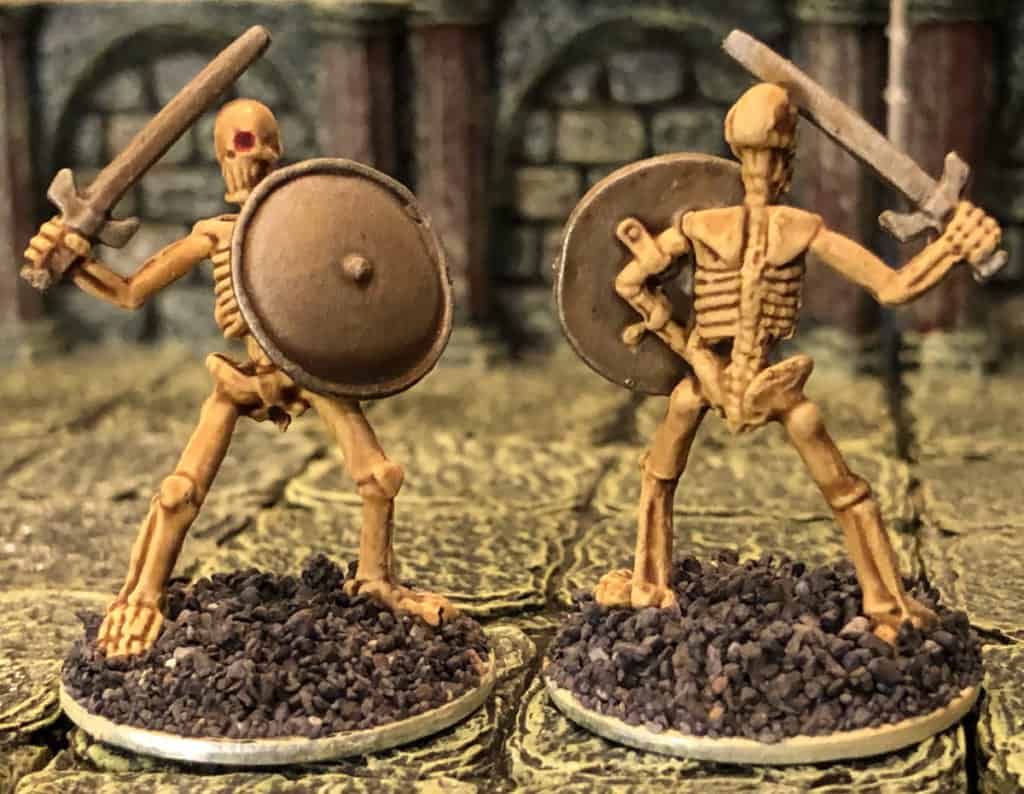
For first time painting, I recommend that you use skeleton miniatures. For unprimed versions, Reaper has several different varieties: Archers, Warriors, Guardians, and a mix (the assortment are metal). Then there is the Nolzur pre-primed skeleton.
The nice thing about skeletons is they’re supposed to look ratty, dirty, and faded. If you “botch” the paint job, you can just tell your players it was an artistic choice. Regardless, I recommend starting with skeleton archers. There is no metal pieces, so the base coating choices are simple and easy.
Priming Your Miniature
For each technique, you will need supplies:
- Miniature(s)
- Something to keep the mini upright when you spray it
- Primer
- Ventilated space
Most of the miniatures your buy do not come pre-primed. The one exception are the Nolzur’s Marvelous Miniatures from WizKids. These miniatures are ready to be painted straight from the box.
With most other miniatures, especially plastic ones you will want to gently wash them with soap and water (maybe even an old soft toothbrush) before priming them. Miniatures are made from molds. The molds often have an oil placed them to keep the miniatures from sticking when the molds are pulled apart.
This residue will also keep your primer from adhering to the miniature. Reaper Plastic Miniatures are especially known for this residue. They are great miniatures, but they just need a washing and drying before priming.
Next, you will need to decide where to spray your miniatures. Inhaling the fumes from spray paint is dangerous. Please do not spray inside your home, even with a window open. I spray outside or in my garage with the bay doors open.
If this is simply not an option for you, then I recommend using brush on primers. I use old brushes for this. Like with your other paints, thin it with water. Apply the least amount possible to have coverage.
Most primers are in spray cans. I personally like Army Painter primer, which come in a variety of colors. The various colors are helpful if you’re painting a lot of the same miniature that has a primary color. Their colored primers can double as an initial base coat. Using a non-neutral primer is going to be the exception for your painting.
When spraying paint, you must think about what is behind the target of your paint. If you don’t, you will get primer all over your car in your garage! If I’m spraying outside, I will place my mini on top of my yard-debris container or a flat rock. Inside my garage, I’ve converted a cardboard box into a spray box.
I prefer the yard debris container. It allows me to walk around the mini while spraying. I can get a coat on all sides without touching it. The only downside is getting to undersurfaces on the mini.
Most of your miniatures should be primed either white or black. There is a big debate on whether or not you should prime with white or black primer. For the beginner, there is not a wrong choice.
For myself, I use white primer if my base coat colors are going to be lighter colors. Colors such as red, yellow, tan, off-whites, etc. You will need less coats of acrylic paint.
I use black primer when my base coats are darker colors: browns, blues, dark reds, and greens. I also use black primer if the miniature is wearing a lot of metal armor. The secret to getting good looking steel or silver is starting with a black coat (chain mail) or a dark grey coat (plate mail).
The criticisms of partisans against either black or white primer is the lack of contrast on the miniature. While not important at the end, that contrast helps your eye pick up on some of the finer details of the miniature (also called the sculpt).
The problem is not with white or black per se. The problem is your primed figure is monochromatic. When it is all one color, it is always harder for the eye to pick up the details!
There is a simple solution to this problem, whether or not you started with white or black primer: grey primer. I’m not suggesting you start with grey primer (although you could if your miniature is predominantly plate mail and shield).
Once you’ve primed your miniature with white or black and let it dry, then go back and do a very light misting of grey primer. This will settle on the raised areas of your miniature, which creates the contrast you need to pick out the finer details.
Alternatively, you could just use some grey acrylic paint and do a very light dry brushing of the entire figure. This will also cause the highest points, the edges, the finer details to stand out. What is dry brushing you ask? Read on!
Regardless, be sure to shake your spray can very well! Use as little primer as possible so you don’t obscure the details you are wanting to highlight. Even if you do not have good coverage, let it dry and do another light coat of primer.
Another point about priming. You’ll find that your spray can will likely knock over your plastic miniatures and maybe even some smaller metal ones. There are two solutions: sticky stack or a miniature holder. I recommend the latter because you’ll want it for when you paint. But to hold the miniature securely, there will be small areas of the base that will not be covered with primer. You’ll have to touch those up after it dries.
For your skeletal archers, you can go with either black or white primer. White because, well bones. Black emphasizes the space or holes between the bones.
Base Coating the Miniature
Base coating means painting the parts of your figure in a single color of paint. For a humanoid figure, the skin is all one color, the pants another color, the shirt a different color and the boots a fourth color. You then paint the base a fifth color. It doesn’t matter which color, that is your artistic choice.
While my article on painting supplies goes into greater detail about paints, you will want to buy acrylic paint made speaking for miniature hobby painting. There are two major brands of paint: Citadel and Vallejo. Reaper and Army Painter also have their own line of paints.
Regardless of which brand of paint you get, you’ll want to thin the paint. A 1-1 water to paint ratio is probably too thin except for specific advanced techniques. You’ll want somewhere between a 2-1 or 3-1 ratio. If you want your paint to not dry out as quickly, then you can use acrylic thinner mediums.
When base coating, you want to apply two to three layers of paint. It is ok if the first layer doesn’t have full coverage (you can see the white or black primer underneath the coat). With black primer, you’ll likely need more coats than with white primer. That is why you’ll need a second or third coat of thinned paint.
With your skeleton archers I recommend base coating the bones with either Vallejo Ivory, the aptly named Reaper Skeleton Bone, or Citadel Ushabti Bone. Again, visit my Resource Page for links to these products.
For the bow, a basic brown paint is fine. Vallejo Charred Brown if you want a darker hue or regular brown for a medium hue. Citadel Rhinox Hide is another option. For the ground, I recommend Citadel Tallarn Sand or Vallejo Flat Green or Goblin Green or Brown Sand. Just remember not to make the ground too close in hue to your bones.
These miniatures do have quivers with arrows. For the quivers and straps use Vallejo Leather Brown or Reaper’s Leather Brown. If you care to paint the arrow shafts, use the same brown as the bow. For simplicity, use either Flat Green or Goblin Green for the arrow fletchings.
That’s all you need to do to base coat: pick three to four colors. Do not worry if your miniature looks flat, boring, and basic. All miniatures look like they were painted by a 3rd grader after the base coat stage. It is the first step, literally the base set, of painting.
Look for spots of white or black primer peeking through. That is is a sign that you missed a spot. The great thing about skeletons though is if you used white, you maybe can’t tell! With black primer, if it is space between the bones, you may want to leave it, but only if that is a consistent choice throughout the paint job.
Applying a Wash
A wash is a thin, low pigment paint. Its role is to provide depth and contrast to your miniature. A wash pools in the recesses and low points of the miniature. It provides shadow.
Like primers and base coats, there are several different washes. Citadel’s Agrax Earthshade provides a browner, dirty tone to the model. Nuln oil is a black, dark gray wash giving your skeleton a necrotic or ashy look.
Vallejo has a set of washes, from which the black or sepia are good. The sepia will give the bones a yellowed, weathered look. Black wash, like the Nuln Oil, will give the skeleton a charred look.
You will apply the the wash to the entire figure: bones, ground, and bow. The wash will natural run down and settle into the nooks and crannies. For a skeleton, it is hard to put on too much wash as it will just weather the bones more.
The Reaper Skeleton Archers is a set of three. You can use a different amount of wash on each figure. This will let you see how different amount of wash will change how the figurine looks. Alternatively, use a different color wash on each figure to learn how each one looks once it dries.
Dry Brushing
Drybrushing means loading your brush with paint and then removing most of it by brushing it onto a paper towel. You’ll know when you have removed enough paint when you brush it against the back of your hand and it leaves just a bare amount of color.
You then gently brush, with a quick back-and-forth motion, over the highest surfaces and edges of the model. The idea is that it will apply just a light amount of paint just on the edges. This provides further contrast between the wash.
If you have a choice between having too little or too much paint on your brush, always choose too little. The whole purpose of dry brushing is to apply a small, thin layer of paint to just the raised edges of the sculpt.
If there is no more color being applied from your brush and you want more paint on the figure, just start over again. Load the tip with paint, remove most of it on a paper towel, check the amount on the back of your hand, and apply to the miniature.
Remember, it always possible to add more paint. It is not always possible to remove too much paint.
Dry brushing will ruin your brushes. Use an older, frayed brush. You can buy a brush specifically for dry brushing, such as this Vallejo brush.
Typically, drybrushing uses a lighter, brighter color than the base coat color. But with the skeleton archer, you can simple use the same base color paint. If you want to lighten or brighten the color, just add a white to any of your colors, such as Vallejo’s Dead White. Just one to three drops will do it. I do not recommend putting Dead White on directly as it will create too much contrast.
You do not need to drybrush the bow for a couple of reasons. First, the bone does not have a lot of texture. What little texture it has will be emphasized by the wash.
If you do drybrush, I would just hit the top of the bow stave. Just add a few drops of one of the sand colors recommended for the ground to base coat color. Again, your goal is to create a slightly lighter, brighter version of the same color used in your base coat.
For the base, like the with the bow, dry brushing is not necessary. There is not a lot of texture. If you used a brown base coat, think about using Deep Green in a very light application. It will make the ground look like it is covered with a layer of moss.
If you used one of the green colors, then add a few drops of Escorpena Green to it. This is a very bright green. If you use it by itself, the contrast may be too great and unnatural looking. Don’t be afraid of getting some on the foot bones. It will look like grass stains.
Clear Coat Varnish

You’re done with the painting steps of your miniature! There should be three layers of color. You started with the base coat, which is actually the middle tone of the model.
From there, you darkened and deepened that tone by adding a wash. This is the second layer of color. Finally, by dry brushing (especially if you added a few drops of a lighter pigment), you have your final, highest, and lightest layer of color!
You now want to preserve that paint and protect it. These miniatures are for use on your game table. This means handling them.
There are two types of varnish: gloss and matte. Gloss will make your miniature look shiny and wet. Most miniatures are finished with a matte varnish to give them a more realistic look.
However, the gloss varnish is more protective of the figurine. Therefore, the preferred method is to spray a layer of gloss varnish first. Of course, let it completely dry. You will then coat it with a matte finish.
A word about varnish. If the relative humidity is high, then the varnish may look cloudy when it dries. Therefore, it is recommended that you apply it in the afternoon, as morning air tends to be the most humid part of the day.
If you live somewhere where the humidity is high all day long, then a well-ventilated, air-conditioned area can work. But the key is well-ventilated because you do not want to be breathing the fumes from these cans.
If that is simply not an option for you, then it is recommended that you use a hair dryer on high heat, low fan. This will dry the varnish fast and decrease the water vapor in the air around the miniature.
My final advice is to experiment with colors, washes, and highlights. But several sets of skeletons and practice your basic painting techniques and color choices with them. Skeletons can be used a fodder or minions against your players at any level, which means you cannot have too many of them.
Once you have mastered the skeleton, then find other simple creatures to practice upon. I like undead, so my early choices where skeletons, mummies, and zombies. If undead aren’t your thing, then you cannot have too many orcs of various designs or goblins.
If you want to start to learn on how to paint miniatures, click already! If you want to read more of my posts about Dungeons and Dragons, then click away here! Or maybe you want to explore the wilder (and wider) world of tabletop roleplaying games!
Happy painting!
