I recently backed the successful Kickstarter for the latest version of the Deadlands setting for Savage Worlds Adventure Edition. I decided I should do some research on being a Marshall (Game Master), since its been over seven years since I last run a Savage Worlds Game.
Marshalling in Savage Worlds should follow its motto: Fast! Furious! Fun! The combat rules can get weedy, but remember the average difficulty is a four. Figure out the right skill, have the player role and if its a four or higher, let them do something cool. The rule of cool rules!
In this article, I am going to explain the 10 things that will help you run a Savage Worlds game, especially if your new to the system or new to game mastering! Let’s break it down.
1. Pick Your Genre
The great thing about Savage Worlds is its a generic ruleset. That means you can run Savage Worlds in multiple different genres: Fantasy, Superhero, Sci-Fi, 1920s Adventure Pulp, Horror, Modern, Historical. These all can work using the Savage Worlds system.
The terrible thing about Savage Worlds is its generic ruleset works with any genre! This can lead to analysis paralysis as you try to pick your genre and setting. If you have a strong vision in mind, then go with it. But I ascribe to the Lazy Dungeonmaster theory of game prep by taking a more improv approach to game mastering.
This means spending less time on game prep and more time rolling with the punches at the table. But, you also have to prepare to improvise, which is why I look to use pre-published adventures and settings. I can fall back on what’s written if my improv gets me, and it does, too far over my skis.
But there is more to this then just picking your genre, especially if you’re going to Marshal a long-running campaign. You have to feed your well of inspiration and ideas by consuming media in that genre.
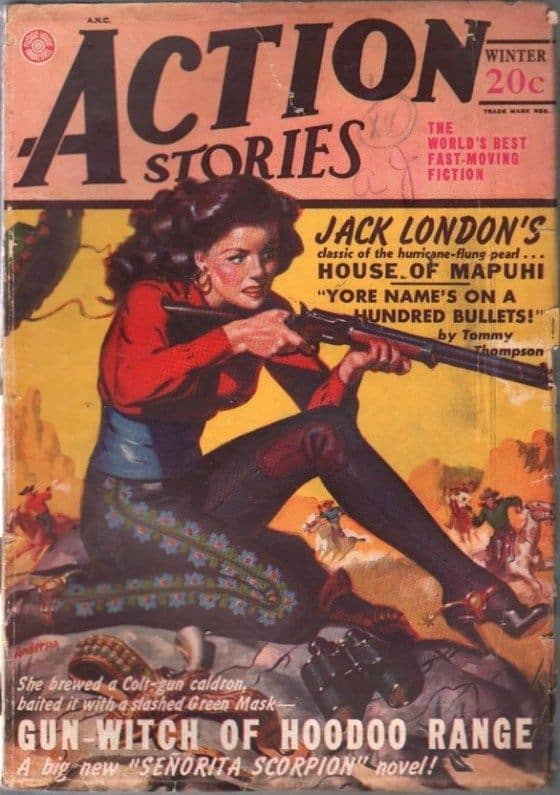
For example, since I’ve backed the latest version of Deadlands, that is a blend of Western and Weird Horror genres. While “immersing” yourself in the genre may be too much to ask, you could spend a few hours each week watching a Western movie. It will give you a feel for the narrative structure, visual style, etc. of the genre.
The Internet is full of opinions about the best Westerns on film. I personally like any of the Clint Eastwood films, especially the “spaghetti” westerns like A Fistful of Dollars, A Few Dollars More, and The Good, The Bad, and the Ugly. But your mileage will definitely vary.
If you’re going for a Superhero game, are your characters going to be high-powered, Avengers or Justice League supers? Or are they going to be lower-powered, less flashy like in the movies Unbreakable and Glass? The former is pulpier with the heroes happening to the world like adventurers in Dungeons and Dragons. In the latter, your characters are learning about their one super-power and how to survive in a grittier style of play.
Also, don’t pick just one genre. Pick two and mash them together, like Deadlands: Western & Horror. Take some inspiration from Shadowrun and mash together Science Fiction and Fantasy. While it may take a little adaptation, nothing stops you from using the Shadowrun setting with the Savage Worlds rules system. Just remember, with the Pulp style of game play, the types of things your characters are doing will be different.
2. Decide How To Handle Spells & Powers
Savage Worlds uses a power-point system for its spells and powers. At character creation, your players may select an Arcane Background Edge. If you don’t know what an Edge is, go read my article providing an overview of the Savage Worlds system. The available Arcane Edges are:
- Gifted — A lesser boon or a minor superpower, a touch of the supernatural.
- Magic — ‘Yer a wizard Harry!
- Miracles — Divine power.
- Psionics — Bend the spoon with your mind.
- Weird Science — Alchemy to Steampunk to Cyberpunk
Generally, you can only pick one of these without permission of the Marshal. If you’re running a Supers game, then maybe that rule will get broken.
After your Arcane Background, you get to pick between 1 to 3 starting Powers, depending on your Background. Powers are your spells, but as listed in the book they are all mechanics and no flavor. This is where Trappings comes in for your players.
In my Dungeons and Dragons campaign, when a player casts a spell for the first time or the first time in a long time, I’ll ask them what the spell looks like. That is its trapping. In Savage Worlds if you want to cast a bolt of fire at your enemy, then you’ll select the Bolt power, which does 2d6 or 3d6 on a raise and costs 1 power point, if you activate the spell.
That’s basically it from the book. The Marshal and the Player will need to agree on the name of the power and the trappings: is it fire, is it ice, is it a swarm of beetles? But if you only have 10 power points, then you’re out of juice after 10 castings in a day.
Maybe I’ve become too use to the gonzo magic of Dungeons and Dragons, but 10 castings in a day of a basic bolt spell doesn’t feel very special. If you go rules-as-written, your magic-types are going to need some back-up firepower.
This is because the power points do not regenerate very fast: 5 points per hour so long as the character is “resting.” This is what I’m getting at when I say you’ll have to decide what to do about spells: how strict or generous will you be with power point regeneration?
But remember, by turning in a Benny, the character can regenerate 5 power points. If you’re generous with Bennies, as I discuss below, then you may not need to house rule your away around this problem. You just have to remind players about turning in a benny for 5 power points.
Being super-strict may impose an Edge-tax on the magicians who will almost have to take the Edge that gives them more power points. Too loose and you’ve greatly increased the power of the mage character at the expense of the other characters. If you’re going to allow your characters to use magic, you’ll need to be prepared to decide whether to use the power point rules as written or to turn the dial up or down.
3. Running Combat
While Savage Worlds promises its system is Fast! Furious! Fun! its combat can bog down. Its Combat rules are 18 pages long. Most of these rules are about imposing various +/- 1 or +/- 2 penalties. Keeping track of each of these situational rules can be difficult to keep track of, even for an experienced Marshall.
I recommend that you create a quick-reference rules sheet for the most used rules. Here is a list of some of the situational rules that can bog down combat:
- Aim
- Deviation rules if a grenade missing its target
- Bound & Entangled
- Called Shots
- Cover
- Defend
- Disarm
- Distract
- The Drop
- Etc.
Notice these situational rules are in alphabetical order, which is how they are listed in the rule book. These can make for a very tactical experience, but they come, in my experience at the expense of Fast! and sometimes even Fun!
Of course, you know your table and players. They may enjoy a gritty, tactical combat. I do in games like Dungeons and Dragons where ranges are short and personal (generally 12 squares or less). In Savage Worlds, ranges are listed in inches, with each inch represent 2 yards. On a standard, 1-inch square battle map, each square is 6 feet.

Most modern firearms in Gumshoe have ranges of 12/24/48 (short/medium/long). This means firing up to 12 squares away is at no penalty. 13 to 24 squares is at only a -2 penalty. For outdoor situations, it is foreseeable that you’re operating in a 48-square diameter battle map. That requires a lot of table top space and tactical details to make interesting.
I find myself using abstract or theatre-of-the-mind combat at least half of the time in Savage Worlds. I will take a page out of the Fate rules system or 13th Age and simply designate the Short, Medium and Far zones and what’s in each zone. It takes 2 movements to get from Far to Medium and 1 movement to get from Medium to Short range. These combats are more often live up to the Savage Worlds’ Motto Fast! Furious! Fun!
Doing it this way turns your combats into a cinematic experience. As the players move, act, and try cool things reward them with +2 bonuses. If they try and fail, then give them a -2 penalty (or the enemies a +2). The only exception to this is if they have an Edge designed for a specific combat maneuver. Don’t punish the player for taking that Edge if you don’t let them shine using it.
4. Multiple Action Penalties
In Savage Worlds combat you have a Move and an Action (plus a Free Action). However, you can take multiple actions on your turn. For example, shooting at two different targets. For each additional action your character takes, she suffers a -2 cumulative penalty to all actions on that turn. You may think this means:
- Action 1
- Action 2 (-2)
- Action 3 (-4)
- Etc.
That is incorrect. For each additional action, it is a cumulative -2 penalty. This means if your character is shooting at two targets in a round:
- Action 1 (-2)
- Action 2 (-2)
If its three targets (assuming your weapons’ rate of firm can do it), then your multi-action penalty is:
- Action 1 (-4)
- Action 2 (-4)
- Action 3 (-4)
If you need a 4 or better to hit, that is a significant deficit to overcome. But as a Marshall, this way of implementing the penalty means that each player must declare all of their actions at the start of their turn:
I am going to move from behind cover and when I get out in the open of the street, I am going to fire at the cowhand down the street. After that I will keep moving across the street. When I get t to the next building, I will then pistol-whip the guy stabbing Jimmy.
“Deadeye” Sally
This describes a movement and two actions, so the shot and the melee attack both have a -2 penalty. If the player says that she is moving out, shooting at the cowhand, then move to the next building. That is a move and an action for no penalty. Once at the building, if she realizes there is another assailant, she cannot just add another action to that turn. She cannot because that would have impose a retroactive -2 to the first action.
The more complicated piece is if the player has a contingent action:
I need to get a better angle to flush the sniper out of cover. So I am going to move, then run to that large rock that is just outside of my pace. When I get there, I am going to drop prone and fire. But first, I am going to pray the Lord will protect me from my enemies by putting up a Barrier around me!
Sister O’Leary
Running is a -2 penalty to all other actions that round. Activating a power is an action. Shooting is an action. This means Sister O’Leary has a -4 to all of action rolls (-2 Running, -2 for taking 2 Actions), even though praying occurs prior to running.
What if she doesn’t roll high enough on her Running check and doesn’t make it to the boulder? She has a choice to make, drop prone and fire anyway, give up on the shot to not alert the enemy to her change in position? Even if she gives up the shot, she must still accept the -4 from her earlier roll.
5. Initiative
You are going to want two to three decks of cards ready to go. Remember, initiative is determined by dealing a card to each player, each group of Extras, and each enemy Wild Card. Initiative starts with Ace, then King and then down the line. Where there are two of the same value card, the order is suites in reverse alphabetical order: Spades –> Hearts –> Diamonds –> Clubs.
You keep dealing from the same deck until a Joker is dealt. The rest of the players get cards from that deck for that round. But when that round is over, you are supposed to shuffle the deck and deal again. Waiting to shuffle 3-4 times can slow down the game, especially if you’re not great at shuffling.
Instead, just move along to your 2nd shuffled deck. Give the to-be-shuffled deck to a player to shuffle. That way you can focus on keeping the combat moving along.
Remember, there are Edges that allow players to obtain additional cards and pick the best one. This is like getting advantage on your initiative rolls in Dungeons & Dragons. Hopefully those players will remember those own Edges and remind you how many cards to deal to them.
The 3rd deck is mostly necessary if you have a Huckster in a Deadlands Game. The Huckster plays a hand of poker against the Devil to cast their spells. This means dealing them a hand, then shuffling the deck for the next time. You could decide the same rule applies: Keep dealing from the same deck to the Huckster until a Joker is dealt.
Finally, players can Hold their action when their card comes up. They signal this by turning their card sideways (think tapping mana in Magic the Gathering). If the character is Shaken or Stunned while Holding, they lose their turn. (SWADE p. 102). If they want to interrupt an enemies turn (go before them), then it is an opposed Athletics test. Failure means they go after the enemy. A tie means the turns are simultaneous.
6. Bennies
Buy a good set of poker chips. You don’t need a lot of them unless you have a lot of players. You can use other things like glass stones, beads, etc. as your tokens. Each player starts the session with 3 Bennies and discards all bennies at the end of the session (use them or lose them). The Marshal starts the session with 1 Benny per player and each Wild Card NPC has 2.
As the Marshall, be generous in giving out Bennies to players. This will show they can spend them and not horde them for the “right” time. Savage Worlds encourages you to especially hand them out when your players lean on their hindrances.
Also, if any player is dealt a Joker in combat (whether at initiative or a Huckster playing a hand with the Devil) then all players get a Benny. But if the Marshall draws a Joker, then a Benny gets put in the pool and all NPC Wild Cards get a Benny.
If you find yourself too distracted by the many things that must be done running a session, delegate the handing out of Bennies to a player. If the player gets a little too generous, find ways to up the challenge. You may also want to rotate which player has that job each session.
Bennies can be used for the following benefits:
- Reroll a Trait check
- Recover from Shaken
- Make a Soak roll to prevent one or more Wounds
- Draw a new initiative card
- Reroll Damage
- Regain Power Points (5 per Benny)
- Influence the Story
Now in prior editions of Deadlands, each poker chip color had a difference effect. The newest edition is being made after a successful Kickstarter, so we will have to wait and see what it does. But in Deadlands Reloaded, the poker chips, 20 white, 10 red, and 5 blue were put into a bag and mixed. Each player drew 3, unless an Edge allowed them more.
White chips worked as normal. Red chips can be used as a white or you can use them to add a d6 to your roll. But if you do that, the Marshall gets to draw a chip from the bag. Blue chips work like Red chips, but the Marshall does not get to draw from the bag.
7. Running Enemies
Non-Player Characters and Monsters come in two flavors: Extras and Wild Cards. The primary difference is that Extras go down if they take even a single wound and they do not get that Wild Card dice to their rolls. Wild Cards are built like characters, get Bennies, take 3 wounds to put down, and get a Wild Card dice.
The tricky part is remembering all of their Traits and Skills. Was the Agility a d6 or a d8? The official stat block just lists a handful of central skills for the creature. But if the antagonist is a human, don’t have to worry too much about the stat block, especially if they’re an Extra.
Average competency is a d6, with above average a d8. So if you think about any particular skill or trait roll that Extra is going to make, they probably only have one skill and/or trait at a d8. If your characters advance to Seasoned or Veteran status, then maybe a particularly powerful Extra will have a d10 in their top skill with a few more d8s.
The same is true of Wild Cards. At the Novice level, maybe a major lieutenant will have a d10 in something, but it still mostly d6s and d8s. You may decide to have few, if any d4s. In other words, once you’ve studied a handful of the human NPC/Monster stat blocks, you can probably wing most fights and opposed rolls.
Monsters are a different story. Many, if not most, have some type of special ability or rule. The start of the Bestiary section has several pages of these various special rules or abilities: Invulnerability, Horns, Tentacles, Low Light Vision, etc.
The stat block for most creatures are simple, especially compared to some Dungeons and Dragons stat blocks. More monstrous opponents (like Dragons or Supernatural Beings) have a longer block. You are not going to be able to just wing it with these blocks.
I know I come back to the Fast! Furious! Fun! motto a lot, but I really try to lean on the Fast! element. The Furious! piece is taken care of by exploding dice (Acing) that can lead to a lot of damage fast. Fun! is what you make of it. But Fast! demands action and pace. It is the foundational element. Think of ways of speeding up combat while still keeping it feeling like Savage Worlds, not some other game system.
8. Taking Damage
The first level of damage in Savage Worlds is Shaken. To become Shaken, you have to take damage that meets or exceeds your Toughness score. Toughness is 2 plus half your Vigor die plus your armor rating. Armor piercing weapons ignore the armor.
If your Vigor is a d4, then your Toughness is 4 (assuming no armor). If you are hit and take 4 to 7 points of damage your character is Shaken. This means that on your turn you can only take Free Actions. Moving is not a Free Action. Running is a Free Action, which means when Shaken you can only move a d6 inches.
Your character has two options to remove the Shaken status on their turn. First, they can spend a Bennie and can take the rest of their action. The other is to succeed on a Spirit Roll, which means rolling a 4 or higher on your Spirit Die or your Wild Card die. If you succeed you can act normally on your turn.
It is always better to just try and make your Spirit Roll, as you can make multiple Free Actions on your turn if you fail (up to a point, the Marshall may impose some limits). If you fail but really want to act, then spend a Benny. Remember, if you’re holding your turn and become Shaken, you lose that turn.
The problem with being Shaken is if another enemy hits you and meets or exceeds your Toughness by 3 (what it takes to Shake a character), you instead suffer a wound. Being Shaken makes you much more vulnerable to subsequent attacks. Your character can spend a Benny to remove Shaken even if it’s not their turn.

If instead, the damage done to your character exceeds your Toughness by 4 (e.g. a Raise), then you are Shaken and take a Wound. So in the example where your character has a Toughness of 4 and you take 8 to 11 points of damage, then your Shaken with a Wound. 12 to 14 points means Shaken and 2 Wounds, etc.
If your character is already Shaken and on the next attack takes 8 damage (exceeds Toughness by 4), then they take 2 Wounds. 12 damage means they take 3 Wounds. All characters can take 3 Wounds without losing consciousness. But with each wound, they have a -1 penalty to all Trait rolls and their Pace. Having 3 Wounds and a -3 Penalty is significant.
Before the Character takes the Wounds, they can spend a Benny to attempt a Soak Roll, which is a Vigor Roll. With a Success (4) they can remove 1 Wound. With each Raise they can remove an additional Wound. If they manage to Soak all of the Wounds caused by the attack, then they also remove the Shaken condition, even if they were Shaken prior to the attack.
Acing damage rolls means that if you roll a 6 on a d6, you get to roll again and add them together. If you keep rolling 6s, that can add up to multiple Raises and Wounds. If, for example, you take 5 Wounds on an attack, then you must roll a 20 or higher on your Vigor roll to not take any of those Wounds. This is the Furious! part of Savage Worlds. Remember, if you already have a Wound penalty, that applies to your Soak Rolls.
Once you’ve taken your fourth Wound your character is Incapacitated. You’re still dealt a card with Initiative in case you bleed out or some other effect occurs. As soon as you’re Incapacitated, you must immediately make a Vigor roll (with the -3 Wound penalty):
| Roll Result | Effect |
| Critical Failure (1 on both dice) | Your character immediately dies |
| Failure (6 or lower) | Roll on Injury Table and your character is Bleeding Out |
| Success (7 or higher) | Roll on Injury Table, but effect goes away when all your Wounds are healed |
| Raise (11 or higher) | Same as Success, but if you still have any Wounds after 24 hours, your injury goes away |
The Injury Table is on page 95 of the Savage Worlds Adventure Edition rulebook. Basically, you have a lingering effect to your limbs, head, or internal organs.
Bleeding Out means that on your character’s turn (because you’re still dealt initiative cards) she must succeed on another Vigor Roll (with the -3 Wound Penalty). A failure (6 or less) means the character dies. A success (7 to 10) means they must make another roll on their next turn. A Raise (11+) the character stabilizes and no further rolls are required.
Bleeding Out can be stopped if a character makes a successful Healing Check.
9. Healing
Wounds can only be healed with a Healing Check or use of the Healing Power within the first hour after they are suffered. This is called the Golden Hour in Savage Worlds.
To heal a Wound with a Healing check, you must roll at least a 4. If the character being healed is Incapacitated, this wakes them and heals the Wound. If the character does not have a First Aid Kit or similar kit, then they suffer a -1 penalty on these checks. For each Raise, another Wound is healed. A Critical Failure causes a Wound.
The time it takes to heal is 10 minutes per Wound level. A character can only make one healing check in that Golden Hour. Another character can make a check. What this means is that a Healing Check in combat only stabilizes a Bleeding Out character, but cannot heal a wound.
Then there is the Healing Power. This a Novice Power and costs 3 Power Points. The Caster must be able to touch the target. If the caster succeeds on an Activation Check, one Wound is healed. A Raise heals two Wounds. The Power cannot heal more than two Wounds.
Additional uses of the Power can be used, so long as there are enough Power Points, to heal Wounds within the Golden Hour. If you’ll recall, spending a Benny will regain 5 Power Points. For 13 Power Points, the character can cast Greater Healing, which allows for the healing of Wounds outside of the Golden Hour.
If the Golden Hour elapses, then Natural Healing is the only other way of removing Wounds. Every five days, the character can make a Vigor roll (with the Wound Penalties). A Success removes a Wound and a Raise removes two Wounds. Additional Raises have no effect.
A Critical Failure increases the Wound level by one. If this pushes the character into Incapacitated, they must make a Vigor roll every 12 hours. A Failure means the character dies, a Success means they roll again in 12 hours, and a Raise means they stabilize. Other characters can make Healing Checks to stabilize the Bleeding Out character.
With Natural Healing, the other characters can make Support Rolls to help give wounded character bonuses to their Vigor Rolls. Of course, if those characters have their own Wounds, those penalties apply to Support Rolls.
10. Support Rolls
Marshalls should encourage players to make Support Rolls to assist other characters. The Supporting character should identify a relevant Skill and work with the Marshall to figure whether or how it would apply. To support a Healing Roll or a Vigor Roll for Natural Healing, Survival may be used to Support by finding healing herbs.
Obviously, a Healing Skill can be used to Support the Natural Healing Vigor Check. Under the right circumstances, a “You can do it!” Persuasion Roll can act as a Support Roll.
A Success on the Support Roll grants a +1 and a Raise is a +2. A Critical Failure imposes a -2 Penalty. The maximum bonus from all Support rolls is a +4.
Support can be used in Combat, to assist another character. While the narrative description can do another of things, a Support roll cannot impose a condition upon an opponent such as Distracted, Vulnerable, or Shaken. To impose one of those conditions requires an opposed test roll, which is harder to succeed on.
While a +1 or +2 does not seem like a large bonus for using an Action, most difficulties are a 4. A +1 or +2 is significant. Also, it is an Action, which means you can make a multiple Actions. Your character could Attack and Support with a -2 Penalty to both rolls.
If you want some links on where to buy Savage Worlds, they can be found over here.
If you want to explore the wilder (and wider) world of tabletop roleplaying games go there! If you want to start to learn on how to paint miniatures, click already! Or maybe you want to read more of my posts about Dungeons and Dragons, then click away here!

